Products
Solutions
Resources
9977 N 90th Street, Suite 250 Scottsdale, AZ 85258 | 1-800-637-7496
© 2024 InEight, Inc. All Rights Reserved | Privacy Statement | Terms of Service | Cookie Policy | Do not sell/share my information

Each data block is a set of columns grouped together based on categories of information. Using data blocks helps you organize and manage all the columns on a page.
Data blocks are customizable, and you can view them side by side and move them within the register. The information in each data block shows in a grid-like format, maintaining a spreadsheet look and feel.

Each type of data block has its own unique default settings such as date range selectors and date preset options (for financial periods). You can choose the total number of columns and panels for each data block.
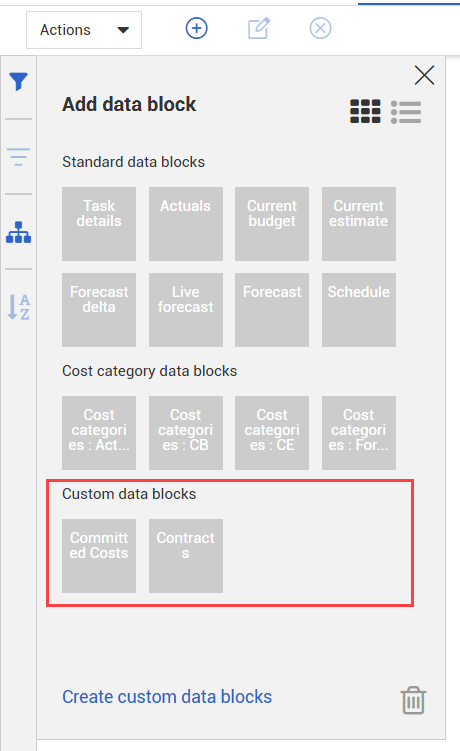
There are three categories of data blocks: Standard, Cost Category and Custom.
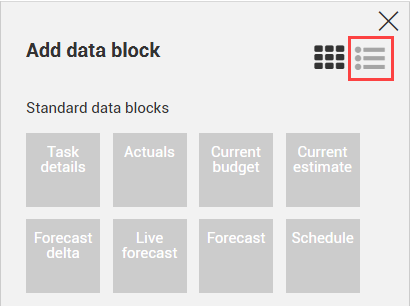
Standard data blocks include the following:
Task Details
Actuals
Current Budget & Estimate
Forecast
Forecast Delta
Live Forecast
Schedule
You can customize the columns grouped within each of these data blocks.
When you add a forecast data block to your view, you are prompted to select the specific forecast to show in this data block. You can create a new private or shared forecast or select an existing forecast.
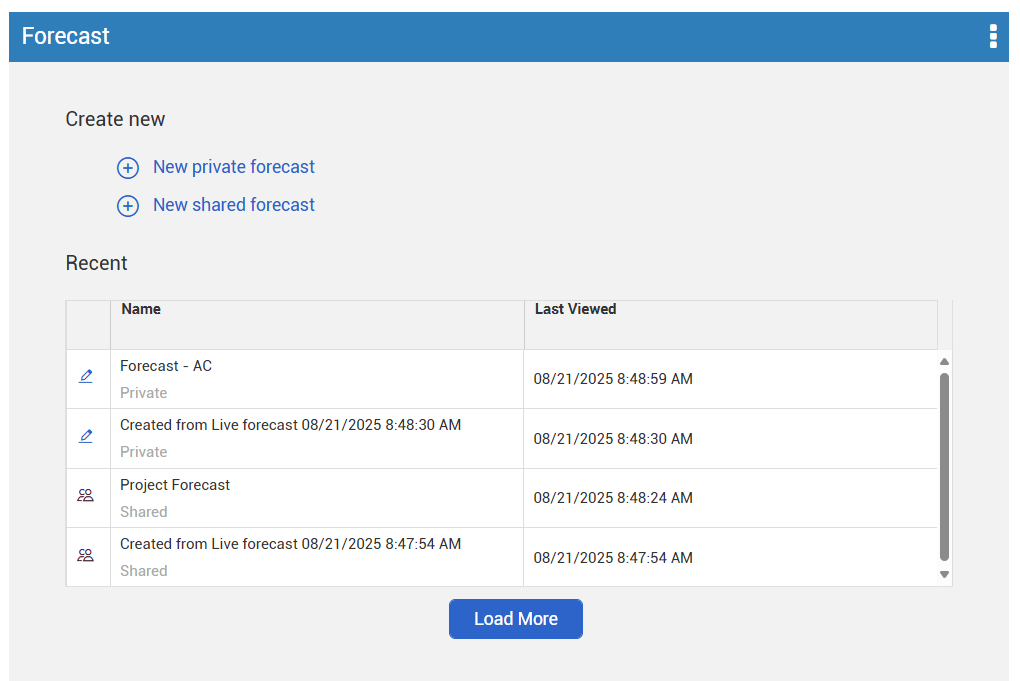
See Forecast Management for more details on forecast data blocks.
The Cost category data blocks organize key project progress information by cost category, and include the following:
Cost categories: Actuals
Cost categories: Current Budget
Cost categories: Current Estimate
Cost categories: Forecast
You can change the columns in Cost Category data blocks.
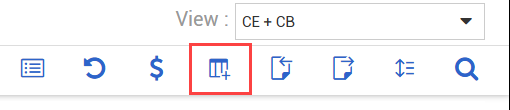
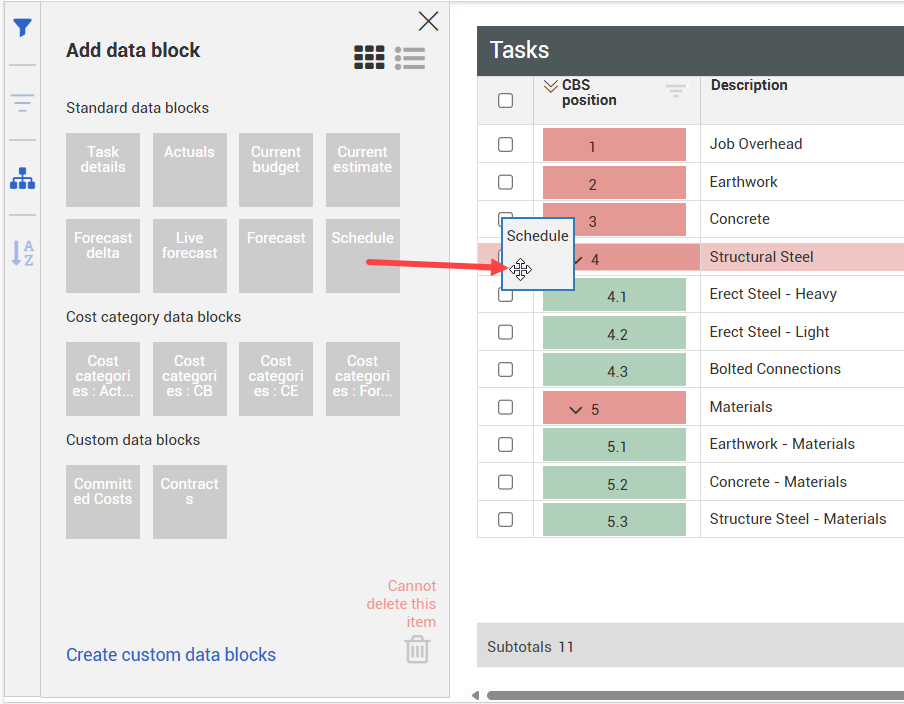
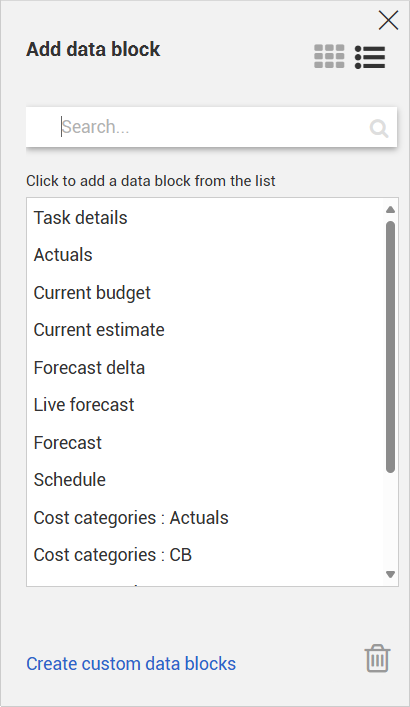
You can manage your data blocks by opening the Add data block slide-out panel. To open the Add data block slide-out panel, click the Add data block icon.
In the Add data block slide-out panel, you can switch between Thumbnail view or List view.
Thumbnail view is the default view of the Add data block slide-out panel. In this view, data blocks are shown as thumbnails.
To add a data block to your view, drag and drop it onto the page from the slide-out panel.
To delete a custom data block, drag and drop it onto the Delete icon.
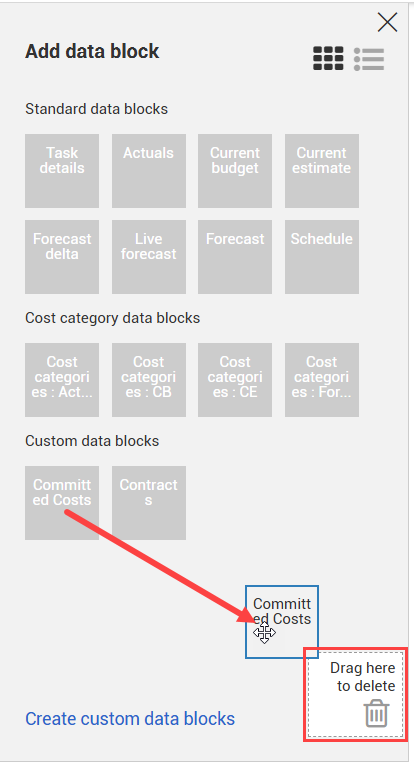
Note: You cannot delete preset data blocks.
Click the List View icon to switch to List view.
In this view, data blocks are shown in a list. You can search for a specific data block from the search bar. You can also add a data block to your view by double-clicking it from the list.
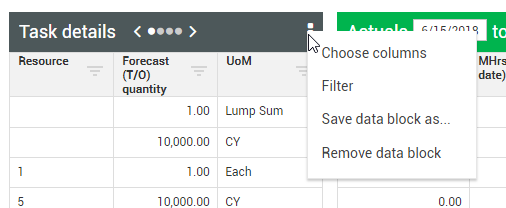
The data block Context Menu allows you to perform different operations specific to the data block you select.
The following table provides an overview of Context Menu options:
|
Data Block Context Menu |
|
|---|---|
|
Title |
Description |
|
Choose columns |
Open the column chooser menu and move, add, and remove columns from the data block. |
|
Filter |
Filter data within a data block. |
|
Save data block as |
Create a copy of the existing data block and save it. |
|
Remove data block |
Remove the data block from the current view. |
|
Color coded terminal items (Tasks data block only) |
Add colors to terminal items of your current data block. |
|
Color-coded CBS position (Tasks data block only) |
Adds colors to all CBS lines. |
|
Show/Hide WBS Phase Code (Tasks data block only) |
Display or remove the WBS Phase Code column within the Tasks data block. |
In the following step by step, you will learn how to modify a custom or an existing data block using the Context Menu.
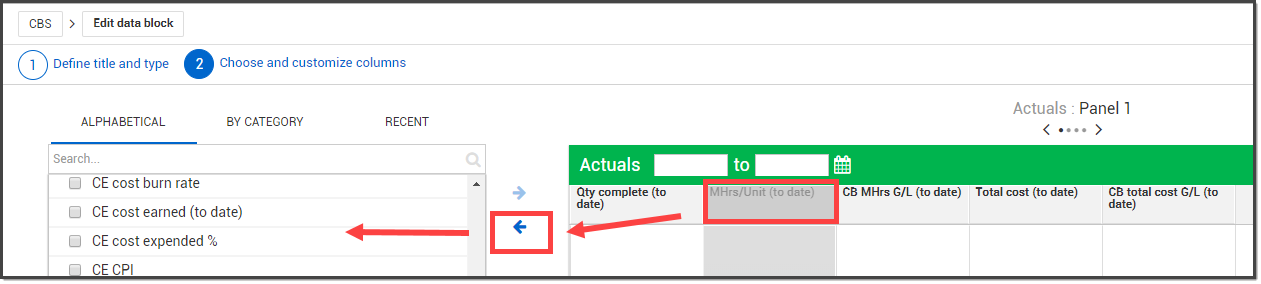
In the CBS register, select the Context Menu icon of the custom data block you created.
Select Choose columns from the context menu.
Add a new column to your custom data block.
Remove a column from your custom data block by selecting the header and clicking the left-facing arrow to return it to the left column.
To close the slide out panel, click the APPLY button on the bottom right of the slide out.
You can create a custom data block based on your needs. Custom data blocks can be organized by color-coded type, and you can apply the same header functionality used in preset data blocks. Custom data blocks can be added to your view or saved for future use.
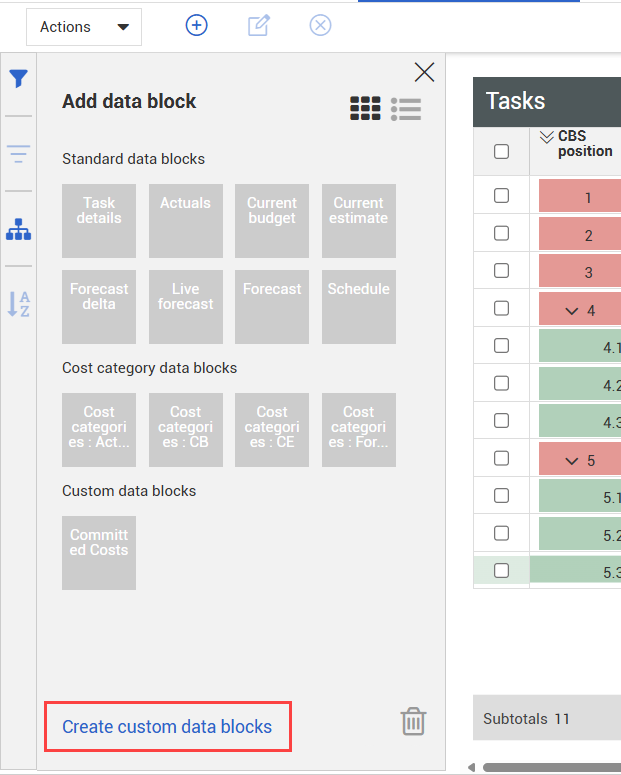
From the right toolbar, click the Add data block icon.
From the Add data block slide-out panel, click Create custom data blocks.
In the data block title field, enter a name for your data block.
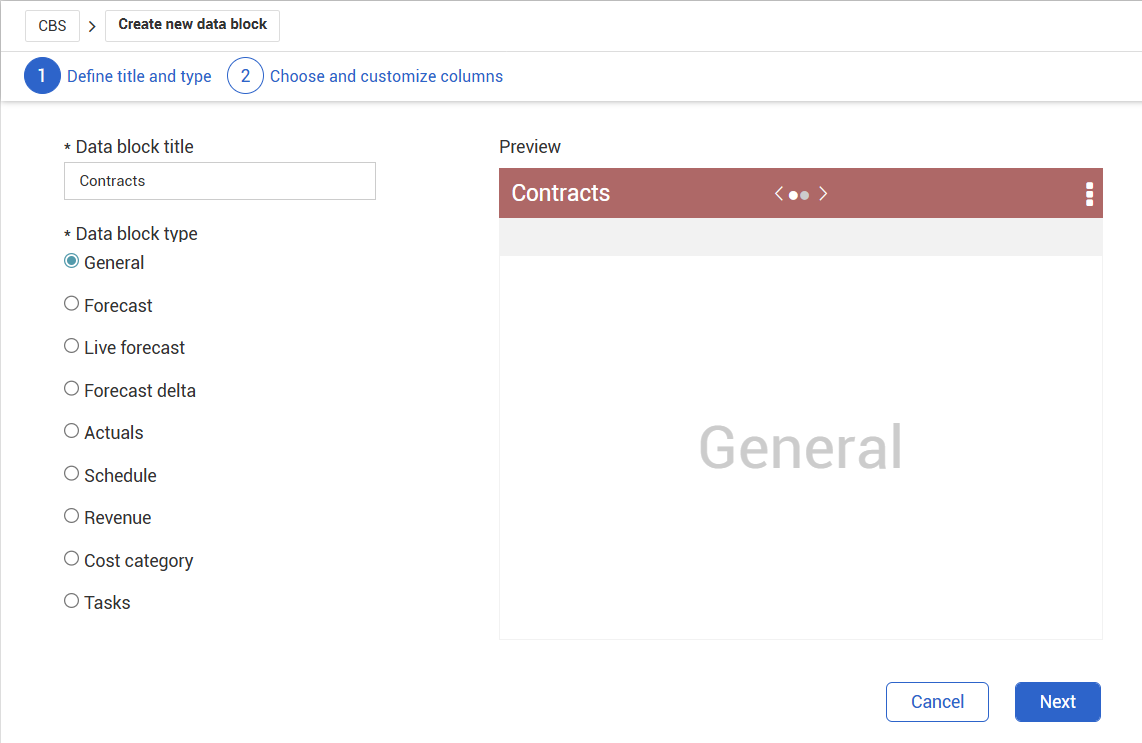
Under Data block type, select the type that best fits your data block.
The forecast, live forecast, forecast delta, and actuals data block types have unique header features.
Click Next.
Add columns to your data block. You can add a column by double-clicking the column from the left panel, or by dragging and dropping the column from the left panel to the data block preview on the right.

You can also add or remove columns by selecting the column(s) and using the left and right arrows.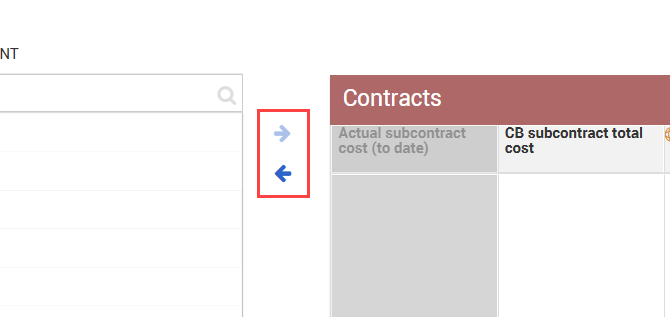
You can reorder the columns from the data block preview by dragging and dropping columns into a new position.
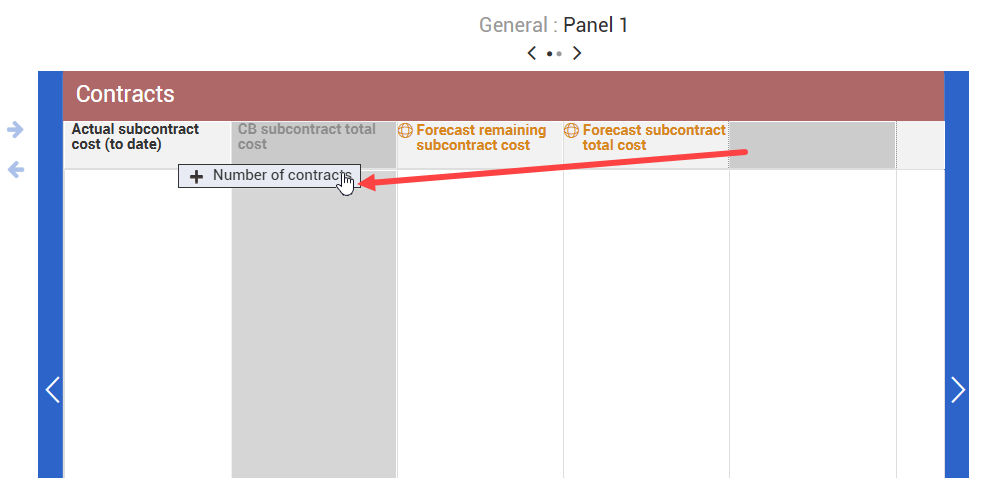
When finished, click Save.
Custom data blocks can be managed from the Add data block slide-out panel.
Additional Information
9977 N 90th Street, Suite 250 Scottsdale, AZ 85258 | 1-800-637-7496
© 2024 InEight, Inc. All Rights Reserved | Privacy Statement | Terms of Service | Cookie Policy | Do not sell/share my information